
Chapter 3 - Visual Programming using MiROS
You will learn the key functions in Mission Control.
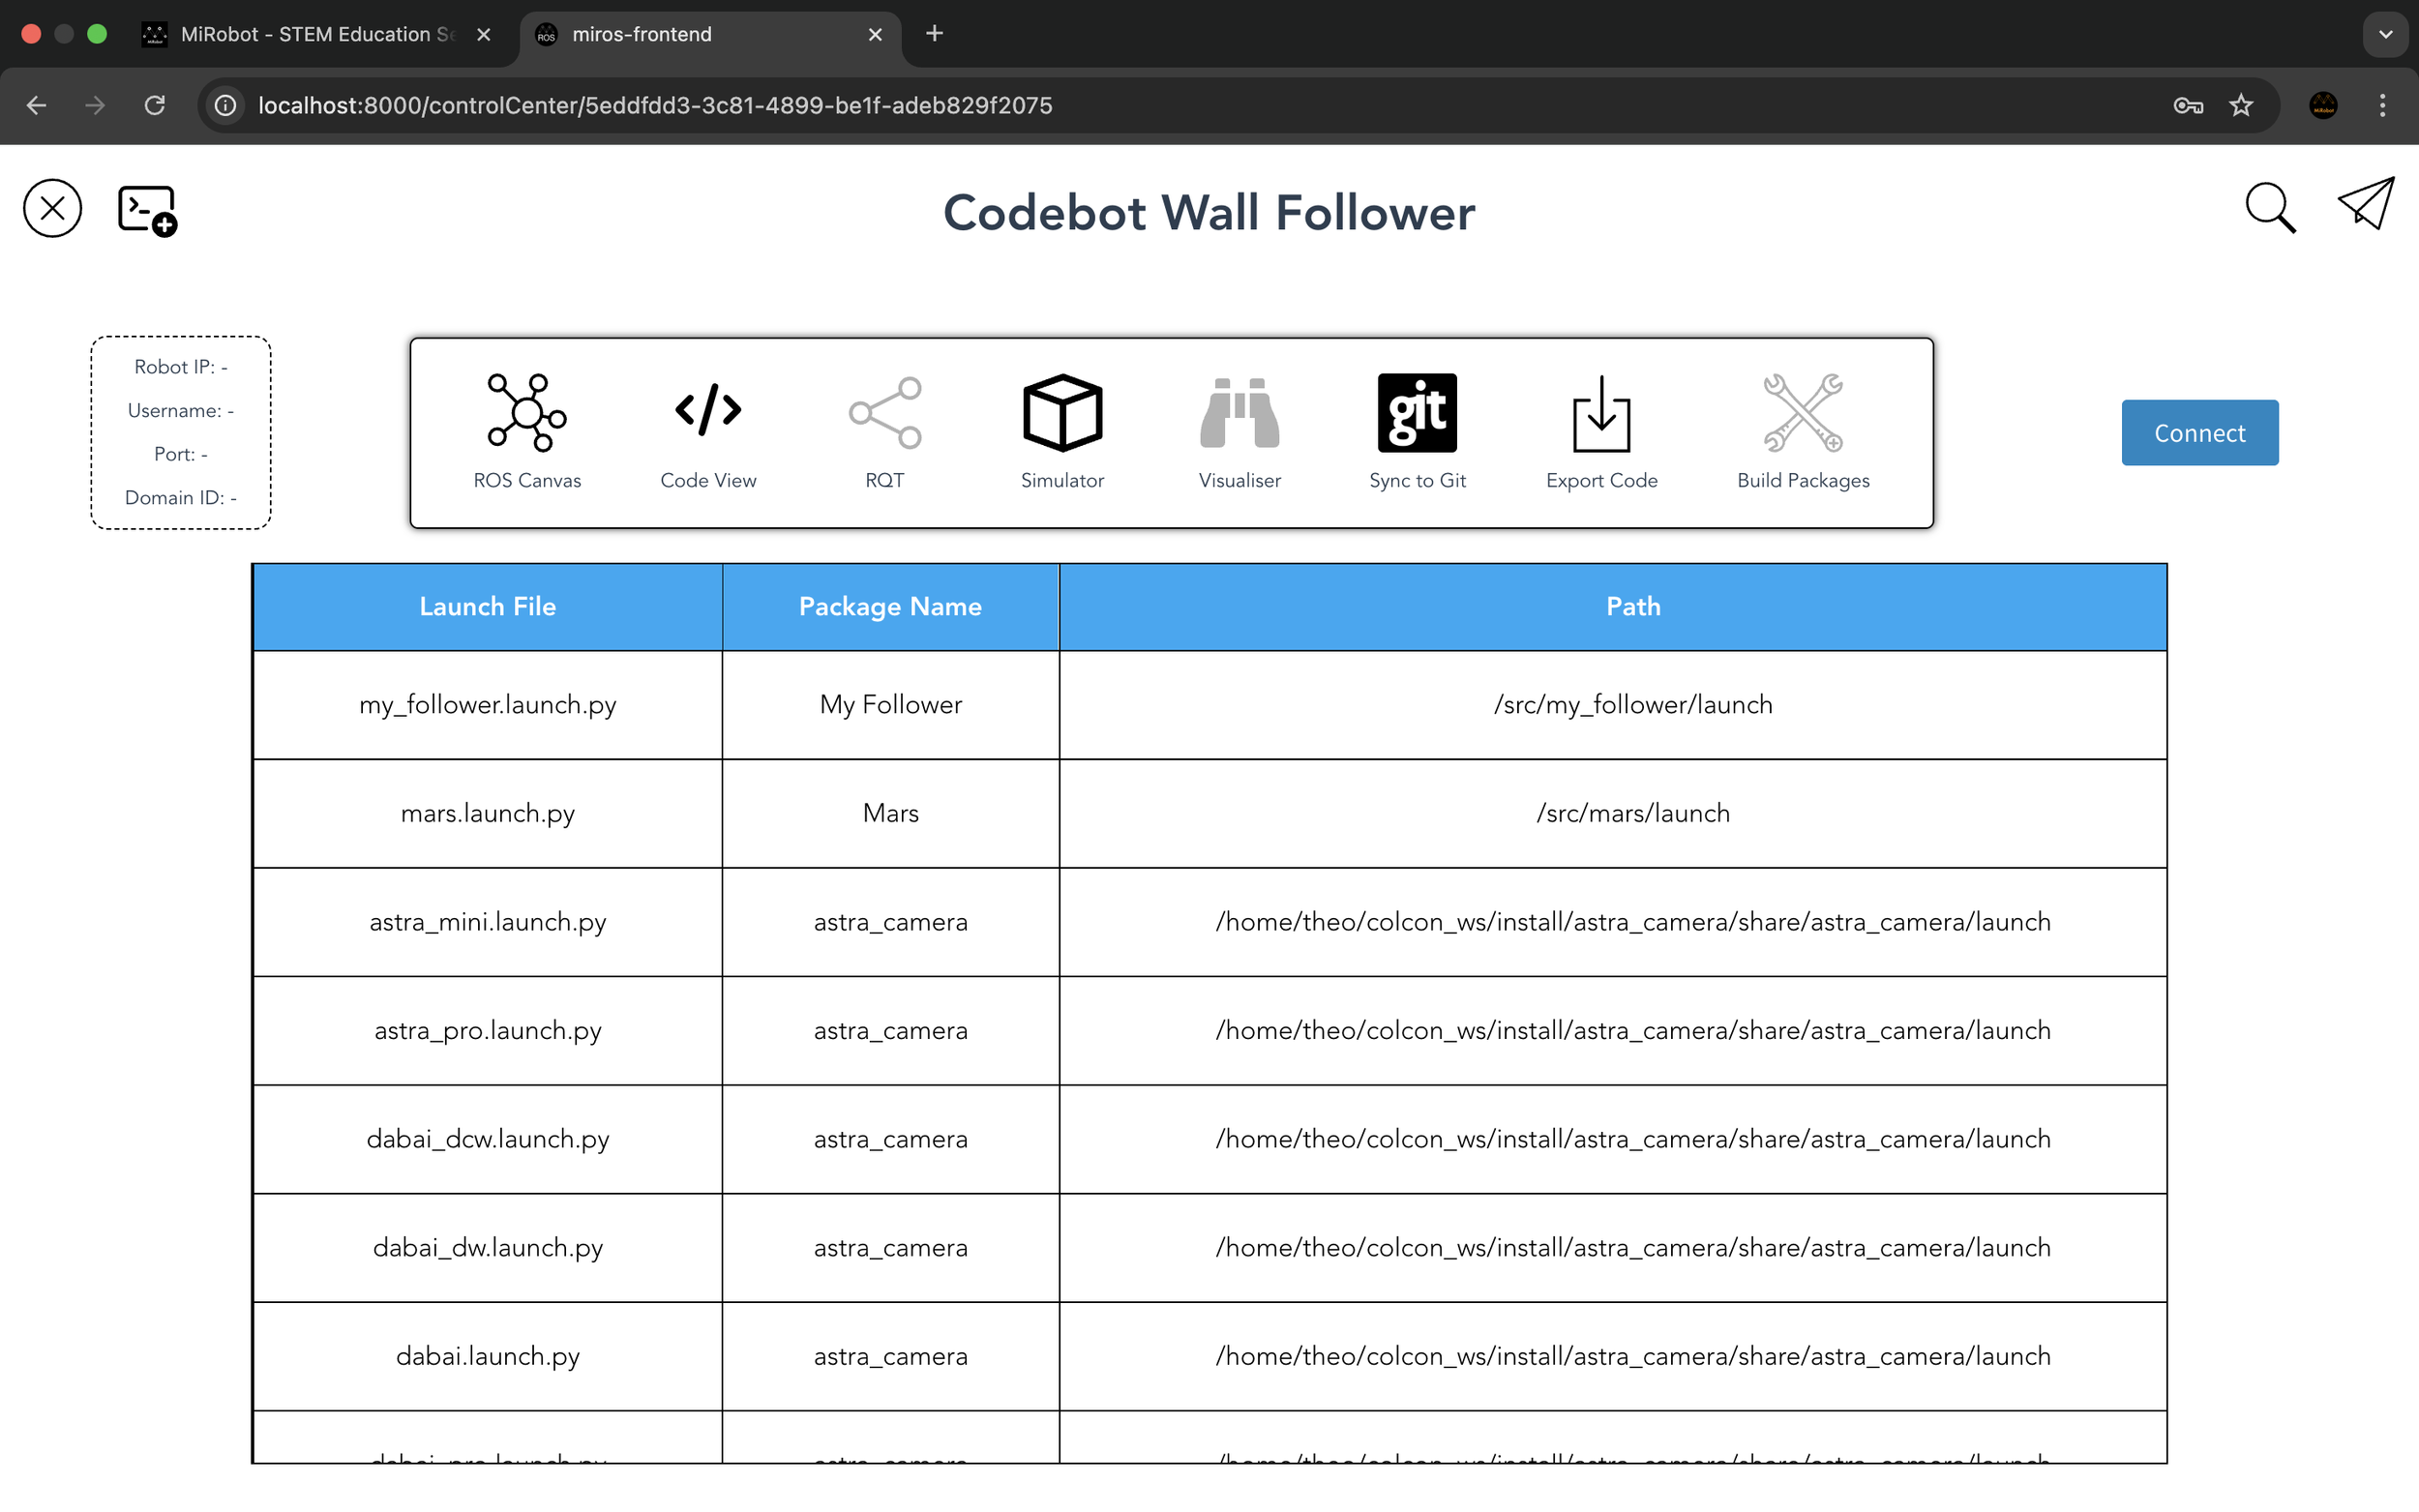
Mission Control is your control center to monitor, communicate and command your robot either in a physical environment or in a simulated environment. The below screenshot is the Mission Control user interface:
IN THIS LESSON
Main Sections
Tool Bar
The Tool Bar is located on the top section of the Mission Control and it contains the following function buttons:
ROS Canvas - access to GUI-based programming environment.
Code View - access the code-base programming environment.
RQT - access ROS RQT tool.
Simulator - access ROS simulators such as Gazebo and Webots.
Visualiser - access ROS visualisation tools such as Rviz and Foxglove.
Sync to Git - connect to your GitHub account and sync with your GitHub repositories.
Export Code - export your MiROS generated ROS code to your localhost computer.
Build Packages - build your ROS packages to the robot you are connecting to.
Connect to Robot
A button to trigger connection between MiROS web interface and your robot via local Wifi network.
Launch Files
Send launch file commands to your robot via constant ssh connection.
If your robot is not in the template
Intall MiROS Agent
If you want to connect MiROS to your own robot and run Rviz/RQT on MiROS, you need to ssh into your robot and install MiROS Agent by copying and pasting the below command lines:
sudo apt-get install wget
wget https://github.com/roboworksdev/miros/raw/main/miros_dependencies.deb
sudo apt-get install -f ./miros_dependencies.deb
After installing MiROS Agent, please restart your robot. Then run the below command line to check whether MiROS Agent is installed successfully on your robot:
systemctl status miros_novnc_startup
If the status shows “Active”, it means you have installed MiROS Agent on your robot successfully.
-
Add a short summary or a list of helpful resources here.