
Chapter 2 - ROS Fundamentals
IN THIS LESSON
You will learn how to create a workspace to start your project.
A workspace is the location of the project where you are developing.
This is how you create a Workspace.
In MiROS
After signing in to MiROS, you will see the Project Manager. Click on the Plus button or select a robot template to start a new project.
You will see the Create a new Workplace page. Name your project and click Save. You have created a new Workspace.
In Ubuntu (Linux)
Before running anything in ROS, the workspace must first be sourced in every new terminal. Sourcing makes the ROS packages available for use in that terminal.
To source a terminal use the following command:
source /opt/ros/humble/setup.bash
After sourcing a terminal, it is best practice to create a new directory for every workspace which includes a folder ‘src’ which is where any packages created should be placed. This is one of the general directory naming conventions which is followed when using ROS. Others include having a ‘launch’ folder and an ‘include’ folder.
mkdir -p ~/ros2_ws/src
cd ~/ros2_ws/src
The above code creates a src directory inside of ros2_ws and then navigates to it.
Once files and packages have populated the workspace (either by cloning existing packages and resolving dependencies or by creating your own packages) the workspace must now be built.
To build a workspace you must always been in the root directory (in this example, in ros2_ws. colcon build won’t fail when you are not in root directory but package will be installed to the wrong location) and then in terminal run the command:
colcon build
The colcon build command will successfully build your workspace, adding 3 new directories; ‘build’, ‘install’ and ‘log’. The ‘install’ directory is where the workspace setup files are stored, this can be used to source your own overlay.
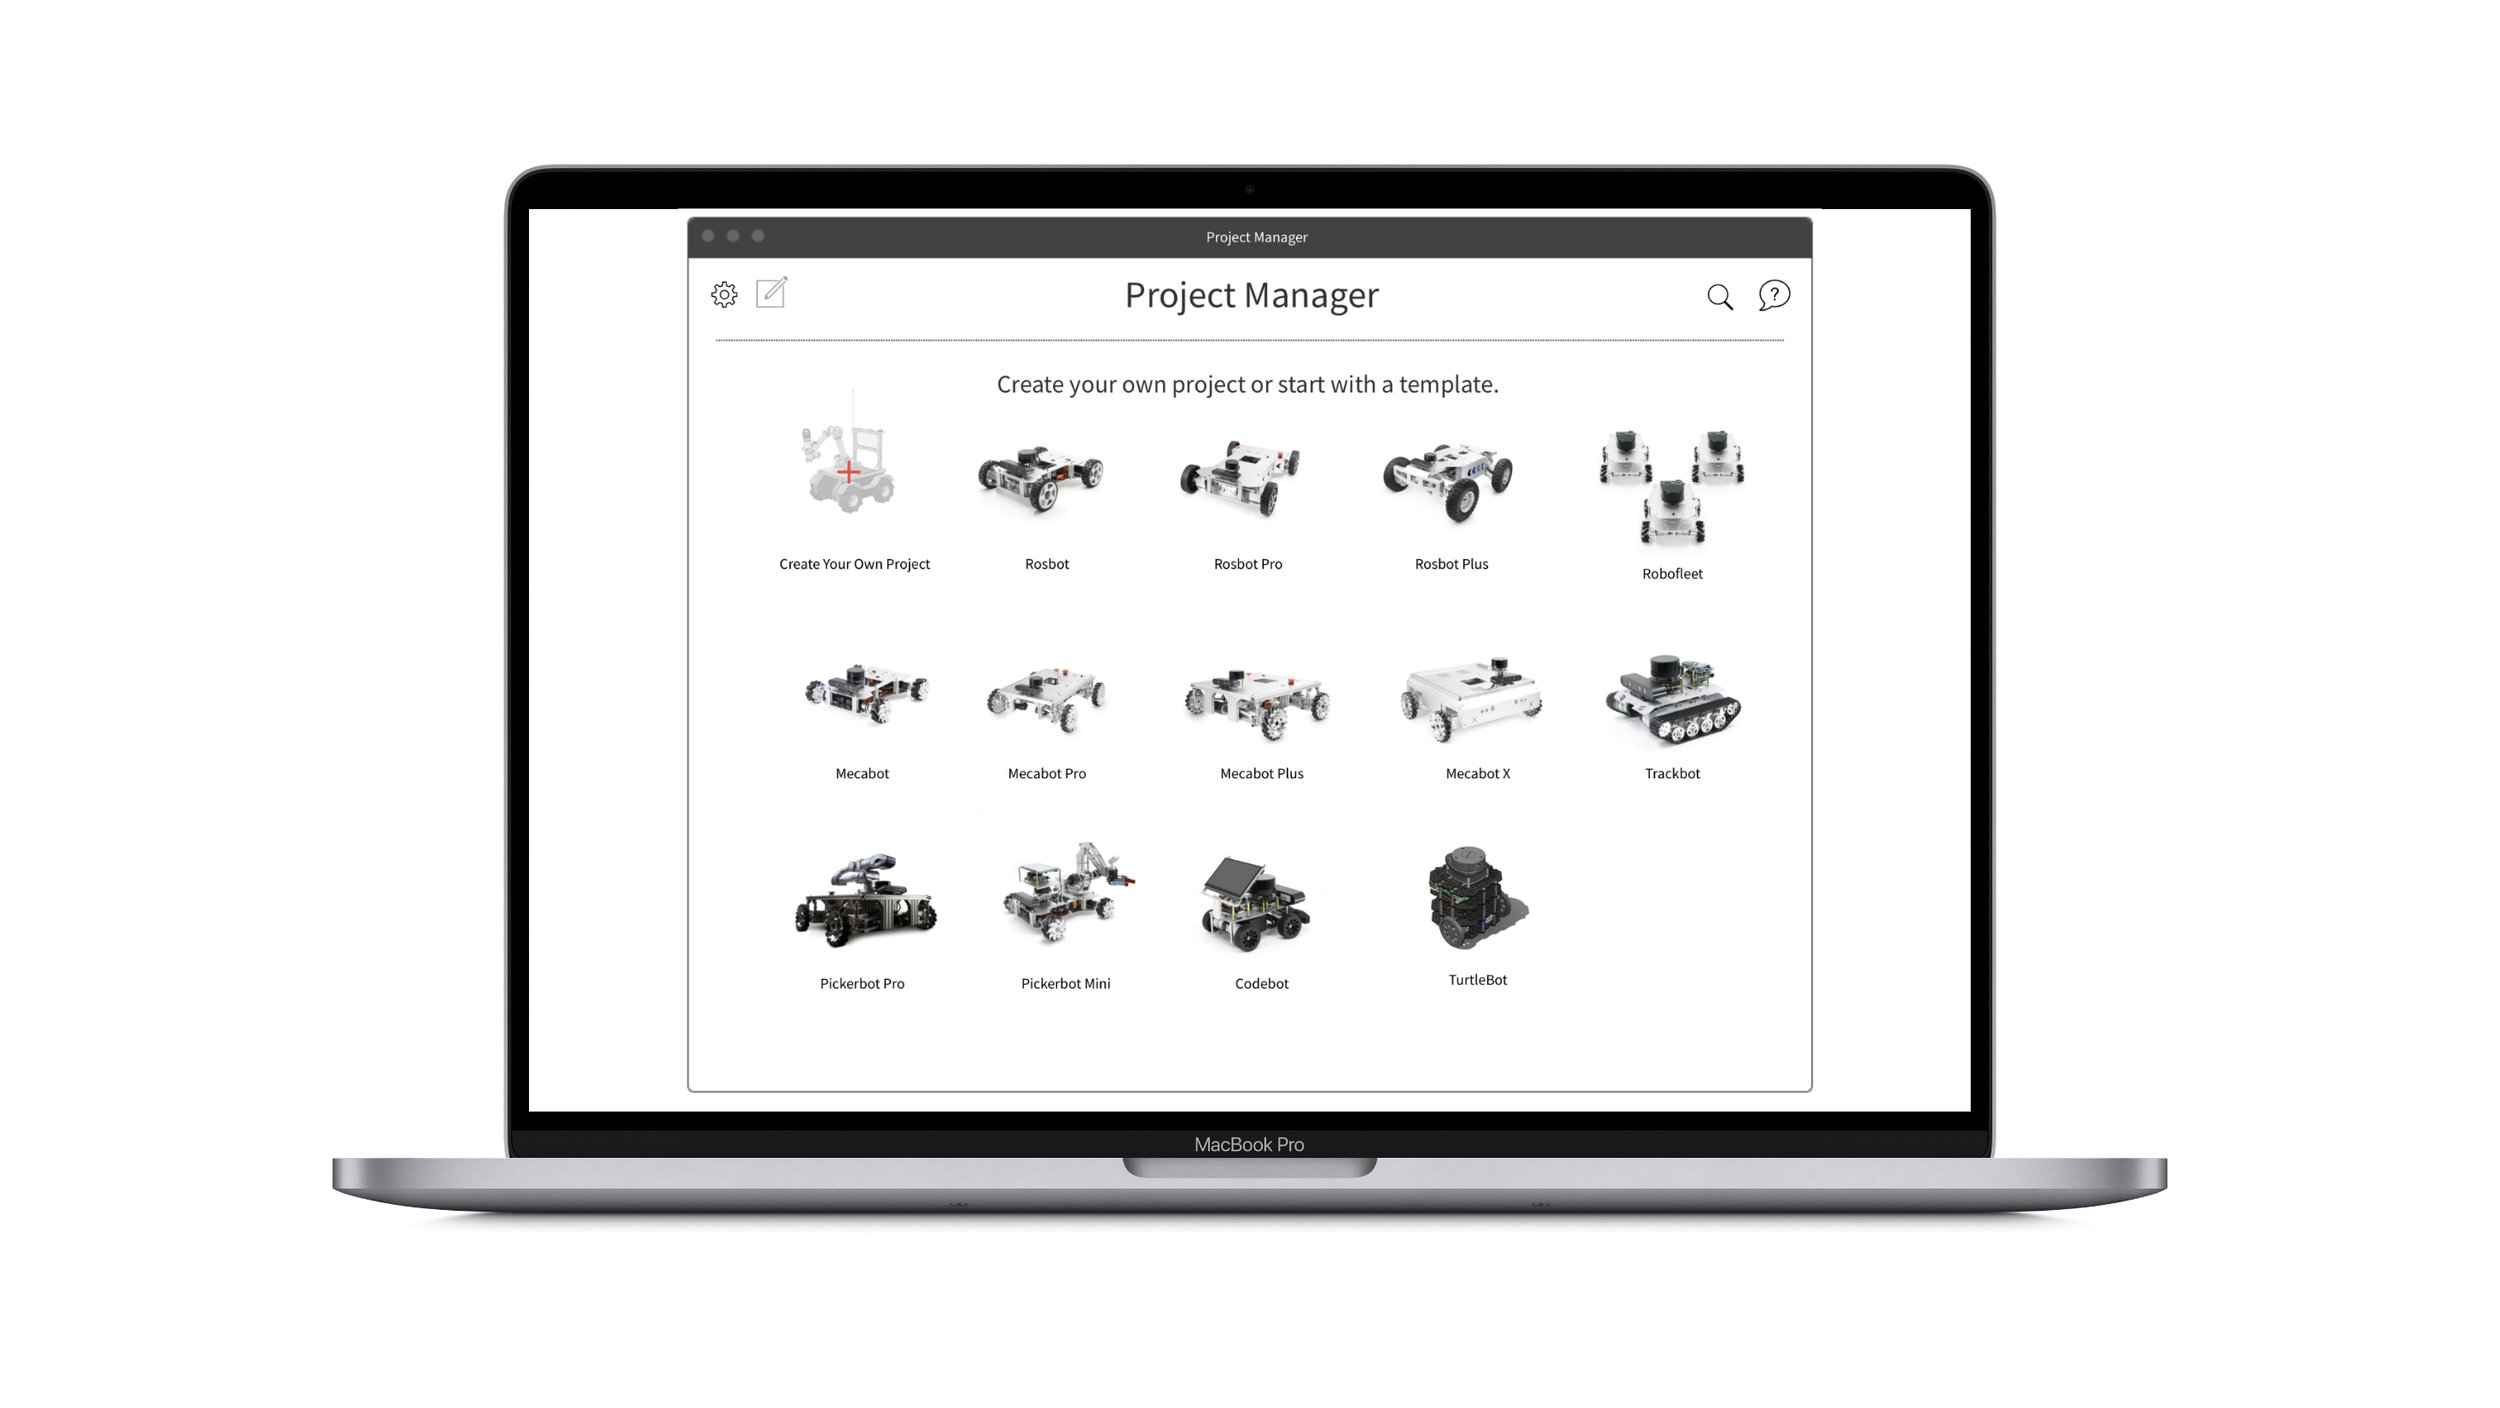
Step 1: Project Manager
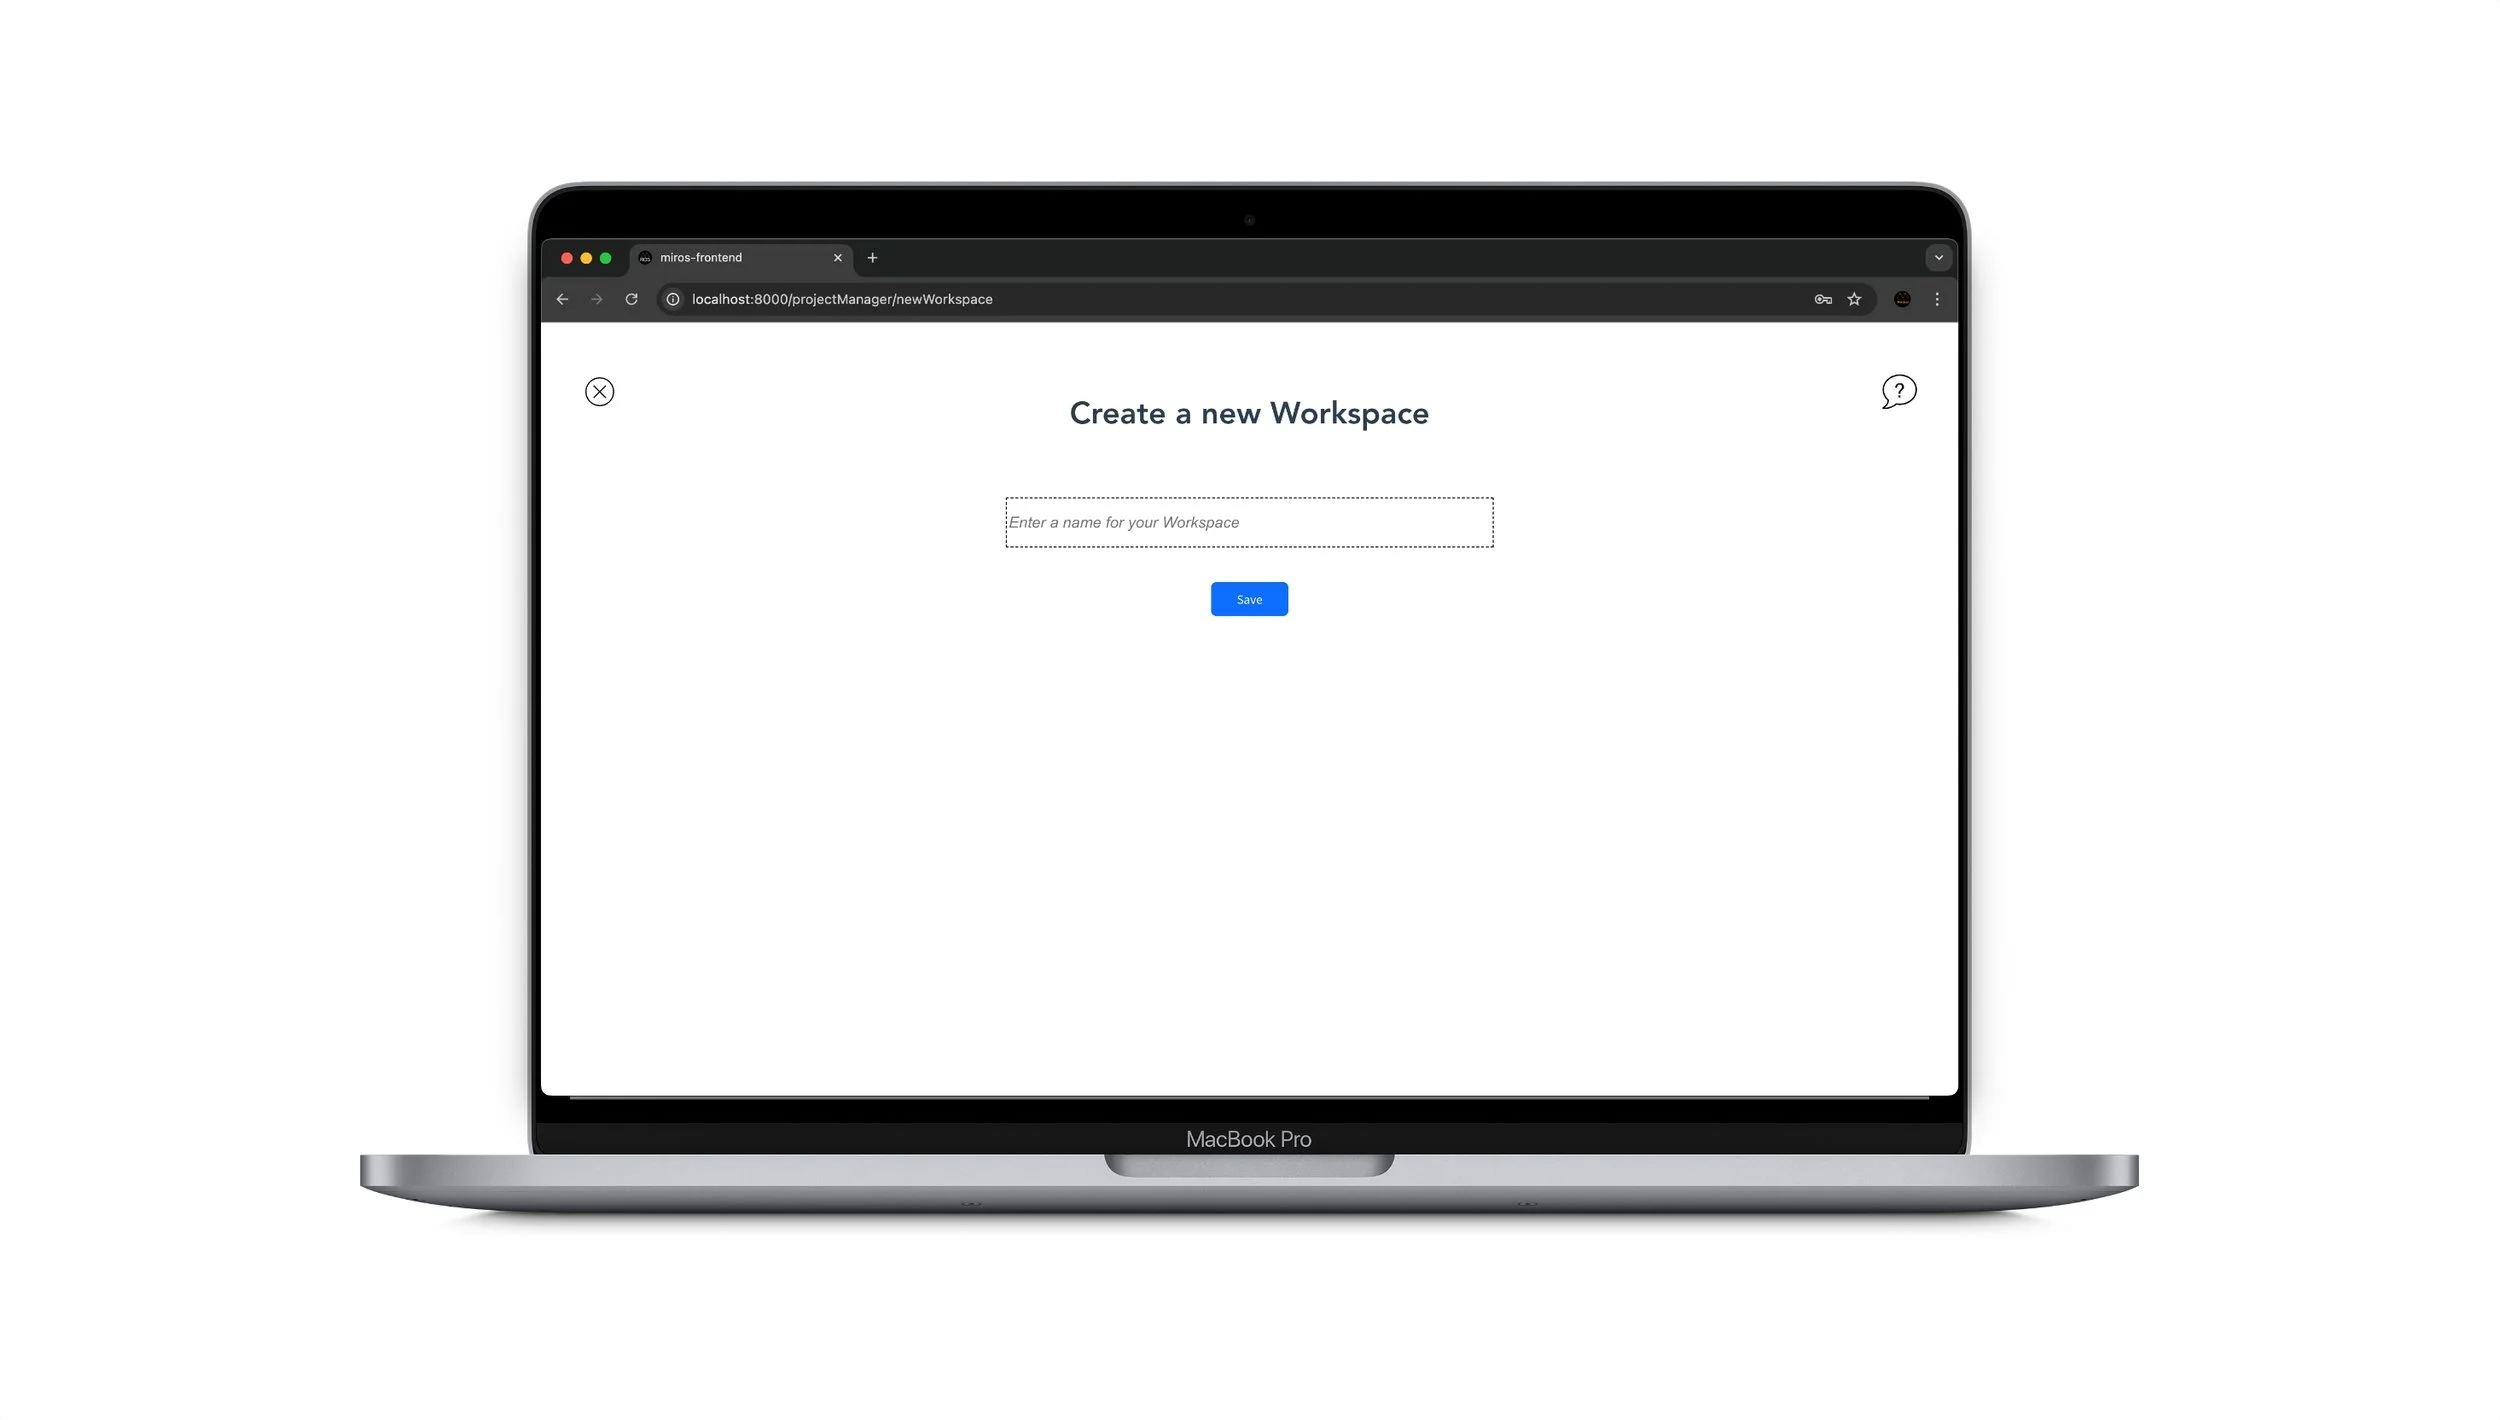
Step 2: Create a new Workspace
-
For more in-depth tutorials and to learn about more advanced aspects of ROS, refer to the documentation at: https://docs.ros.org/en/humble/Tutorials.html